Here we describe shortly how the application has to be configured to be able to interact with EUDI components like attestation providers and how this connects to the wallet SDK.
The minimum iOS deployment version for the application is iOS 17.0. Versions below are not supported by the wallet SDK.
For the application to be able to react on
e.g. credential offers or
presentation requests of a credential some
URL Schemes have to be registered by the wallet application
Info.plist file.
    <key>CFBundleURLTypes</key>
    <array>
        <dict>
            <key>CFBundleTypeRole</key>
            <string>Editor</string>
            <key>CFBundleURLSchemes</key>
            <array>
                <string>openid-credential-offer</string>
            </array>
        </dict>
        <dict>
            <key>CFBundleTypeRole</key>
            <string>Editor</string>
            <key>CFBundleURLSchemes</key>
            <array>
                <string>eu.europa.ec.euidi</string>
            </array>
        </dict>
        <dict>
            <key>CFBundleTypeRole</key>
            <string>Editor</string>
            <key>CFBundleURLSchemes</key>
            <array>
                <string>openid4vp</string>
            </array>
        </dict>
    </array>
The openid-credential-offer will be needed to, for
example, scan a QR code from an attestation provider to receive a
credential e.g. MDL, PID, to trigger the flow in the wallet application.
The eu.europa.ec.eudi is also needed for follow-up
redirects to authenticate the user at the attestation provider and to
download a credential.
The openid4vp is needed to trigger the presentation flow
of a credential e.g. if the user wants to login in to a bank account to
confirm his/her identity.
In addition the Info.plist will also need the privacy keys for camera and bluetooth. This is needed to scan QR codes and to trigger the proximity flow to present data from one wallet to another one without server interactions. The Face ID privacy entry is also needed to e.g. authorize signing of keys for key attestation processes.
    <key>NSBluetoothAlwaysUsageDescription</key>
    <string>OpenID4VP proximity flow</string>
    <key>NSBluetoothPeripheralUsageDescription</key>
    <string>OpenID4VP proximity flow</string>
    <key>NSCameraUsageDescription</key>
    <string>OpenID4VP and OpenID4VCI flows</string>
    <key>NSFaceIDUsageDescription</key>
    <string>Face ID for e.g. key attestation interactions</string>
These are needed to ensure the operability of the wallet app.
This describes how the wallet SDK can be integrated into the
application, so the functionality can be called from the applications
code. Since the wallet SDK is provided as xcframework it
can be integrated in the Xcode project in every way possible for a
standard xcframework, even considering the wallet SDK
itself is implemented in Kotlin, the end product is a regular binary
file for the iOS ecosystem.
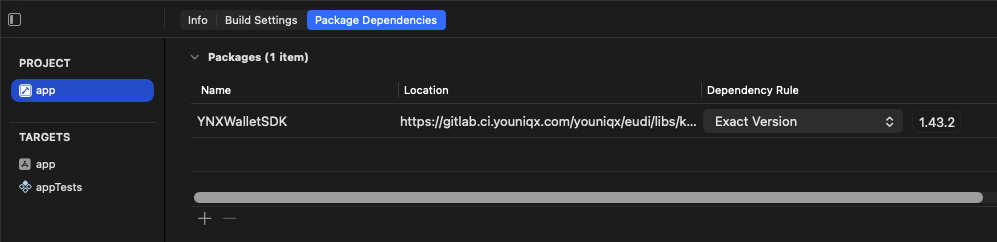
The preferred way to integrate the wallet SDK into an application is via Swift Package Manager (SPM), which is the easiest way to consume it. So you can integrate it via Xcode’s interface to add SPM packages and to use the binary repository url.
Caution this is at the moment not supported in the github repository, but will be in a future update. So please use the approach by directly consuming the xcframework.
https://github.com/youniqx/ynx-wallet-sdk.git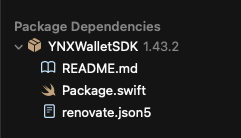
or if you use a local Swift package to manage your dependencies, add it directly with
.package(url: "https://github.com/youniqx/ynx-wallet-sdk.git", exact: "1.46.4")

targets: [
        .target(name: "YourLocalPackage",
            dependencies: [
                .product(name: "YNXWalletSDK", package: "ynx-wallet-sdk")
            ]
        )
to integrate it into the application via SPM.
As the github repository is a private repository - at the time of writing - you have to define a github access token in the .netrc file on your developer machine or use ssh keys for authenticating, so SPM is able to download the binaries from the github-package-registry accordingly.
If you prefer to consume the xcframework directly you can also follow this approach. Simply drag and drop it on the target you want to add it via the General tab into the Frameworks, Libraries, and Embedded Content section.
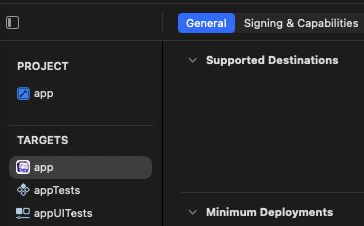
Please ensure that you link it to the application’s target and enable
embed and sign for the framework.

you should also see it linked in the Xcode project via the files tree.
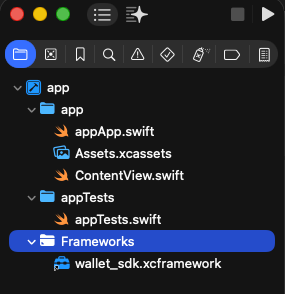
After this you are ready to use the wallet SDK and build your application with its functionality.